Home » Insulation
Category Archives: Insulation
Proper Preparation is Essential For Insulation Removal
Insulation Removal Perth can be a daunting task for homeowners, but it’s an investment in safety and energy efficiency. Before the actual removal can begin, proper preparation is essential.
This involves clearing out items in the attic space, sealing off areas to prevent dust from spreading, and ensuring that all tools and safety equipment are ready for use.
1. Assessment and Inspection
Before beginning insulation removal, it is important to assess the condition of the existing materials. Existing insulation can become damaged by moisture buildup, pest infestation or simple wear and tear. This can affect the effectiveness of the material, leading to gaps and voids that compromise thermal efficiency. It is also important to assess the condition of a home’s existing structure, as well as its ability to regulate temperature effectively.
A thorough inspection of the home’s existing insulation should include a visual examination from inside and outside, as well as access to attics and crawl spaces. This allows for a complete understanding of the situation and helps to identify problem areas. It is also important to take dated pictures during the assessment, which can provide a “running window” of the insulation condition over time.
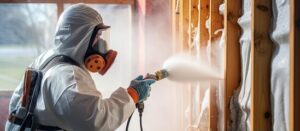
Different types of insulation require different handling techniques, with some requiring more specialized equipment than others. This is particularly true of spray foam insulation, which requires a non-invasive approach to minimize airborne contaminants and prevent damage to the home’s structural elements. A seasoned professional will understand the unique characteristics of each material, and will develop a customized plan for completing the project safely and effectively.
It is also essential to ensure that all workers are properly equipped with the appropriate personal protective equipment (PPE) before starting any work. This includes a respirator, goggles and gloves to protect the eyes, nose, ears and skin from dust and fibers. It is also recommended to ensure that a workspace is well-ventilated to minimize exposure. Lastly, it is important to consult with local regulations regarding the proper disposal of hazardous materials. This will help to avoid environmental and legal liability.
2. Preparation
Insulation removal can be a physically demanding project for DIY enthusiasts, so preparation is key. Whether you’re planning on tackling the job yourself or hiring professionals, understanding the different types of insulation and signs of damage can help you make an informed decision. Additionally, familiarizing yourself with the proper safety guidelines can help you avoid costly mistakes and ensure a safe and successful project.
During the assessment and inspection phase, a professional will examine your insulation to determine the type and severity of any damage or inefficiency. The inspection can also reveal any hidden issues like exposed wiring or potential mold growth, which can be dangerous if not addressed quickly.
To prepare for the removal process, it’s essential to clear the area and cover items that may be damaged by dust or insulation particles. Preparing the work space also helps to minimize contamination and ensure proper ventilation. Having the right tools can help streamline the process and ensure proper execution, so make sure to have plenty of trash bags and a vacuum that’s designed for insulation.
It’s important to use protective gear during the entire process, including gloves, goggles, and a mask. This will prevent inhalation of harmful particles, protect against irritants, and ensure your skin doesn’t come into contact with toxic chemicals or allergens. Additionally, it’s a good idea to invest in a stud finder to identify wall studs, which will reduce the risk of damaging walls during the removal process.
Lastly, it’s essential to start the insulation removal process at the far end of your attic access, rather than near the entrance. This will prevent you from walking over areas that have already been cleaned, which can redistribute debris and dust throughout the room.
3. Removal
Insulation removal is the process of safely and systematically extracting insulation material from buildings. It can be necessary for a variety of reasons, including addressing damaged or ineffective insulation, eliminating pest infestations, improving energy efficiency, and complying with environmental regulations. It is important that the insulation removal process is handled by trained and experienced professionals to ensure the safety of everyone in the building.
The first step in the insulation removal process is a thorough assessment and inspection. This involves a professional examining the insulation for signs of damage, contamination, or inefficiency. They will determine the best course of action based on their findings.
During the insulation removal process, attic spaces will be cleared of any furniture and boxes to create space for workers and avoid unnecessary damage. The insulation is then blown or rolled out and removed from the attic, and it is often bagged for proper disposal. The process typically takes several hours, depending on the amount of insulation that needs to be removed.
Careful preparation is also necessary in crawl spaces to minimize potential hazards. Workers should wear a respirator, mask, and appropriate protective gear to reduce exposure to harmful materials. They should also ensure that there is adequate ventilation to avoid carbon monoxide buildup.
Once the insulation has been disposed of, it is important to sanitize the attic and prepare it for new installation. This will include repairing any attic vents, sealing any entry points used by pests or rodents, and ensuring the area is safe and clean for renovations. Once the attic is clean, it is ready for new insulation that will help to keep your home safe and efficient.
4. Cleanup
For homeowners who choose to tackle the removal of blown-in cellulose insulation on their own, it is important to take the proper precautions. This includes clear identification of the specific material being removed, which determines the appropriate tools and methods for the job. It also helps to set up a workspace outside of the attic to avoid contamination and limit dust or debris spreading throughout the home. Protective gear should include gloves, a mask or respirator, and eye protection to prevent inhalation and skin contact with contaminants. Ventilation is essential to minimize the spread of pollutants as well.
Preparing the Workspace
Prior to beginning a project, the homeowner must clear any stored items and prepare the attic space. This includes clearing a path from the attic access to the insulated area, covering the attic floor and walls with a protective cover, setting up the commercial vacuum or HEPA filtered shop-vac inside the attic for attic cleanup, and preparing waste bags for disposal. It’s also a good idea to start at the far end of the attic, so that the homeowner isn’t constantly walking over areas that have already been cleaned, redistributing dust or debris.
After the cleanup is complete, the attic space must be sealed and the insulation properly discarded. This can be done by bagging it in heavy-duty plastic for curbside pickup or bringing it to a designated waste facility. It’s important to check local regulations before disposing of old insulation, as many communities have strict guidelines regarding the disposal of certain materials.
5. Disposal
Insulation removal is a messy, dirty job that requires the right tools and experience. It’s important that this project is left to the professionals, as contaminated or moldy insulation can harbor rodents, insects and moisture, leading to health hazards and damage to property.
Before starting the actual removal process, it is vital to create a clear plan of action that addresses all steps and safety precautions. This includes sealing off living areas with plastic sheeting and securing vents, which can prevent dust from spreading throughout the home during the process. In addition, it’s crucial to wear personal protective equipment, including a mask, in order to minimize the risk of breathing in harmful contaminants.
Depending on the type of insulation in question, certain materials can be reused or recycled. This can include fiberglass batts or rolls, which may be able to be sold to individuals looking for insulation material or donated to local non-profit organizations and homeless shelters. On the other hand, loose-fill and blown insulation must be sucked up using an industrial vacuum with a HEPA filter in order to be properly disposed of.
For any other types of insulation, disposal methods are regulated by local governments or waste management facilities. Consult your municipality for guidelines, and be sure to use heavy-duty waste bags to collect the insulation before taking it to the landfill. You can also rent a dumpster for larger insulation projects to streamline the removal process and reduce costs.
It is also important to keep accurate records of your insulation disposal, as some materials (particularly asbestos and vermiculite) require special handling and disposal processes. This will help to ensure that you are in compliance with federal and state environmental regulations.